Find out more after the jump and please click any image to zoom.
Have fun :)
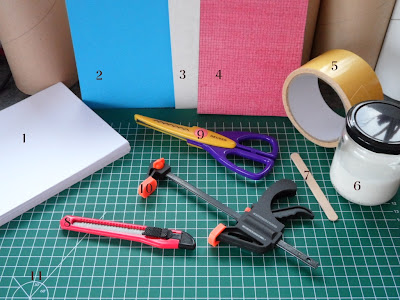
What I used:
The papery stuff:
Paper (1), all cut to the same size
Two pieces of coloured paper (2), cut to the same size as the rest of the paper (to cover the notepad with)
Cardboard (3), fairly sturdy, two pieces, also cut to the same size, which made up the back
Decorative paper (4), cut into two strips, each slightly wider than the notepad and roughly 5 centimetres high
The sharp stuff:
Craft knife (8)
Craft scissors (9), with a scalloped edge
The sticky stuff:
Wood glue (6)
Double-sided tape (5), five centimetres wide
Other tools:
Ice-lolly stick (7), to apply the glue with
Cutting mat (11)
Ruler (not in picture)
Pencil (not in picture)
Glue clamps (10), I used three
What I did:
First, I made myself a nice paper sandwich, starting with one piece of cardboard (the "nicest-looking" side placed down-wards). Next, half of the white paper, one piece of coloured paper, with the "good" side facing upwards. Then, the second piece of coloured paper, with the "good" side facing down(!!!). And finally, the second half of the white paper, and the second piece of cardboard with the good side placed upwards.
 |
| Paper Sandwich |
 |
| Stack clamped together, with view of coloured paper in the middle |
Then came the tricky part; aligning the lot so it all looked nice and even. When I was finally happy with how things looked, I took two glue clamps (whilst trying to grow an extra set of hands) and positioned them on either side of the "sandwich". I put them as close to the top of the notepad as possible, but still at a big enough distance to not have to worry about getting them covered in glue.
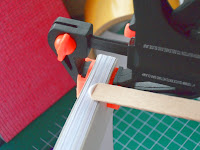 |
| Applying the wood glue |
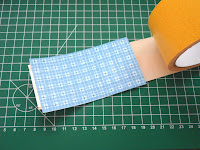 |
| Sticking the paper strip to the tape |
 |
| Cutting the scalloped edge |
And then I made another one...
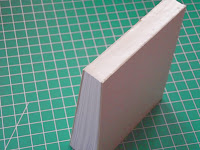 |
| The clamps have been removed |
 |
| Cutting the "spine" |
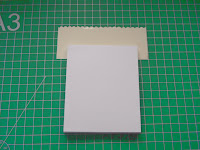 |
| Putting notepad on top of sticky strip |
 |
| Turned upright to stick to "spine" |
 |
| Cutting off excess sticky strip |
 |
| Tadaaa! |
I didn't have enough paper to make a thicker stack, but with these glue clamps I reckon it would be possible to make them as thick as 5 to 10 centimetres!
If I'm not mistaken I should have quite a bit of recycled paper in a box somewhere, I think I might just give it a try... I'll post some pictures if and when I do :)


No comments:
Post a Comment